|
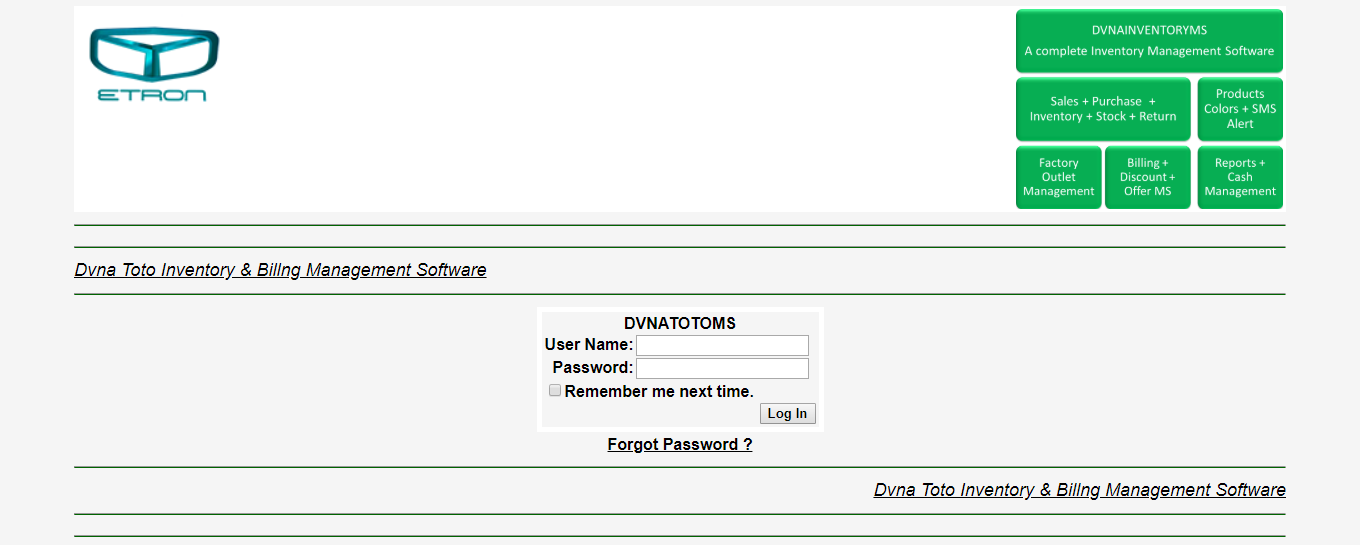
Dvna Toto Inventory & Billing Management Software is design for Inventory of products manufactured inside workshop or purchase from outside of any other dealer, wholesaler and distributer. It will manage, Inventory Entry, Price Settings, Barcode settings, Products Sales, Out Of Stock, Available, and Sold etc. Below given page is login page. From here you can login into application by using your User Name and Password.
|
|
Step 1.
|
|
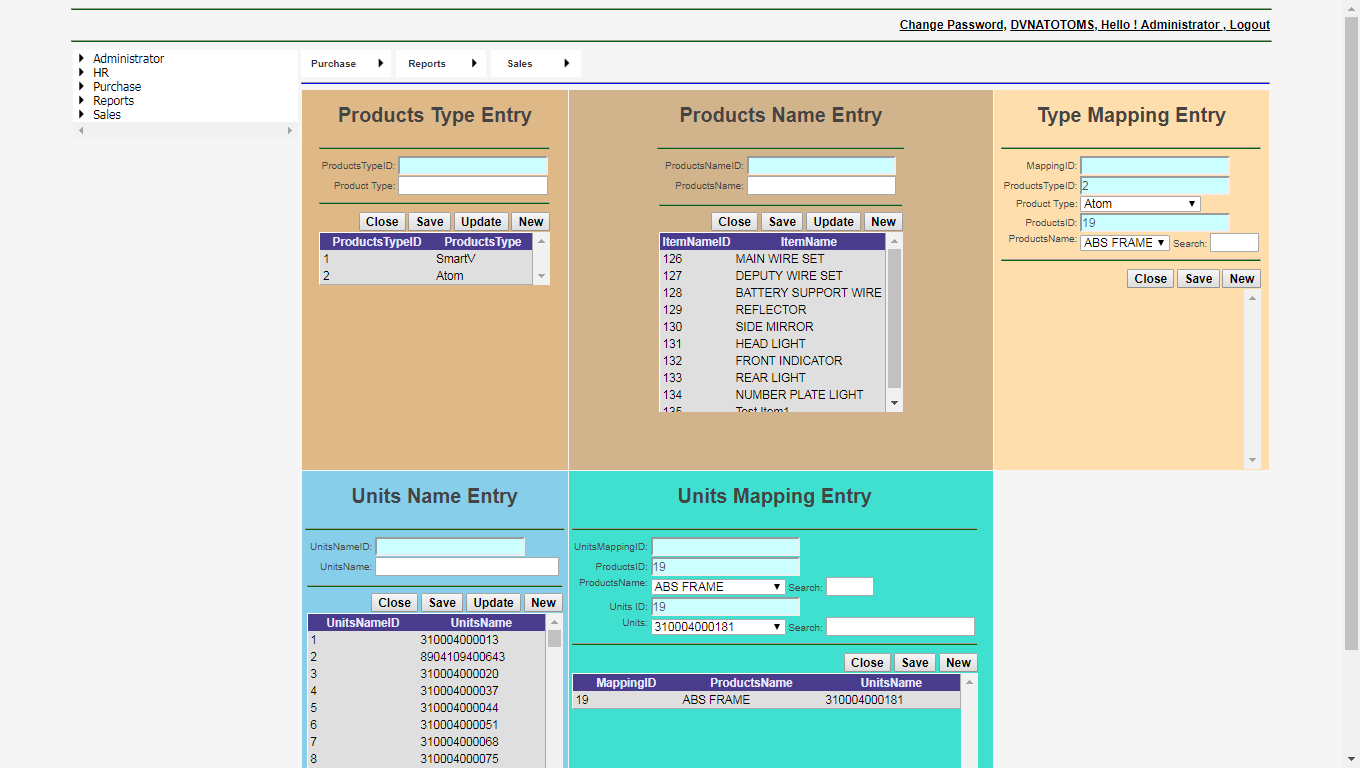
After getting logins you will see contents page as shown below. This is basically dashboard of application from here you can go according to desired work. First of all you have to go as below shown for application configuration. You need to go purchase menu and select products type entry.
|

|
Step 2.
|
|
Product Type Entry is the combinations of products Name Entry, Products name and Type mapping entry, Units Name Entry (Barcode of Each Products) and its mapping entry. Here all these entry is prerequisite configuration for application. You can configure these items entry according to business needs and availability for your business needs. Hence here is configuration understanding to run the application functionality. If you will not learn these entries then you are not capable to handle this application. This configuration is one time configuration to run the application.
|
|
Step 3.
|
|
Price Entry Page: Here you have to set price of products according to business needs. You can also enter the quantity of products. This is also called Inventory Entry of products. It is also kinds of configuration for your business needs. There are two types of inventory Entry from here.
|
- (a) Individual Products with the help of barcode reader or scanner
- (b) Group Entry For Your Products
|
(a) Individual Products Entry with the help of barcode reader or scanner:
|
|
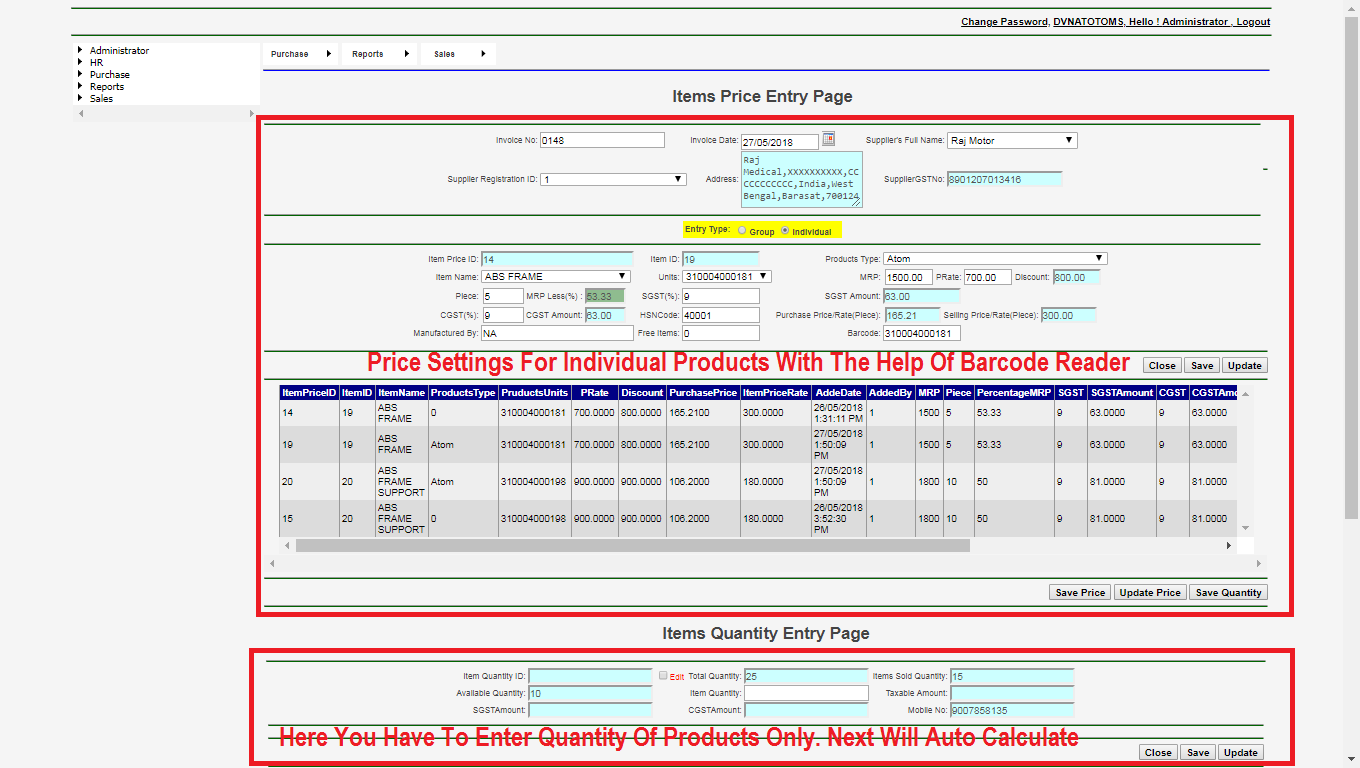
This is an inventory entry method from here you can enter individual products with the help of barcode. You have to put barcode in barcode section either manually or with the help of barcode scanner. Price entry
page layout has two sections red mark section is price entry and green mark section is quantity entry section. The image of layout is shown below. You have to fill the form like invoice no, Invoice date, Supplier full name and his registration id. Next you have to put barcode in barcode section. You have to put MRP, PRate then it will auto calculate discount. You have to put piece. Here piece means number of items in your MRP mention. Suppose you are putting 10 products MRP then piece will be 10. If you are putting 5 products MRP then Piece will be 5 and you are putting 1 product MRP then its piece will be 1. Now put SGST % it will calculate SGST Amount, put CGST % and it will calculate CGST amount. HSN code, manufacture optional, free items by default free items will be zero. Click on save. Now your price settings completed for individual product. Please repeat same steps for other products
|
|
|
Quantity Entry Section: After setting price of products go to quantity section above mention in images in red mark section. Here you have to put quantity only. After putting quantity it will auto calculate taxable amount, SGST and CGST amount. Now click on save quantity. In this way you have completed your quantity entry for individual products. Hence Inventory entry is completed for individual product.
|
(b) Group Inventory Entry for Your Products:
|
|
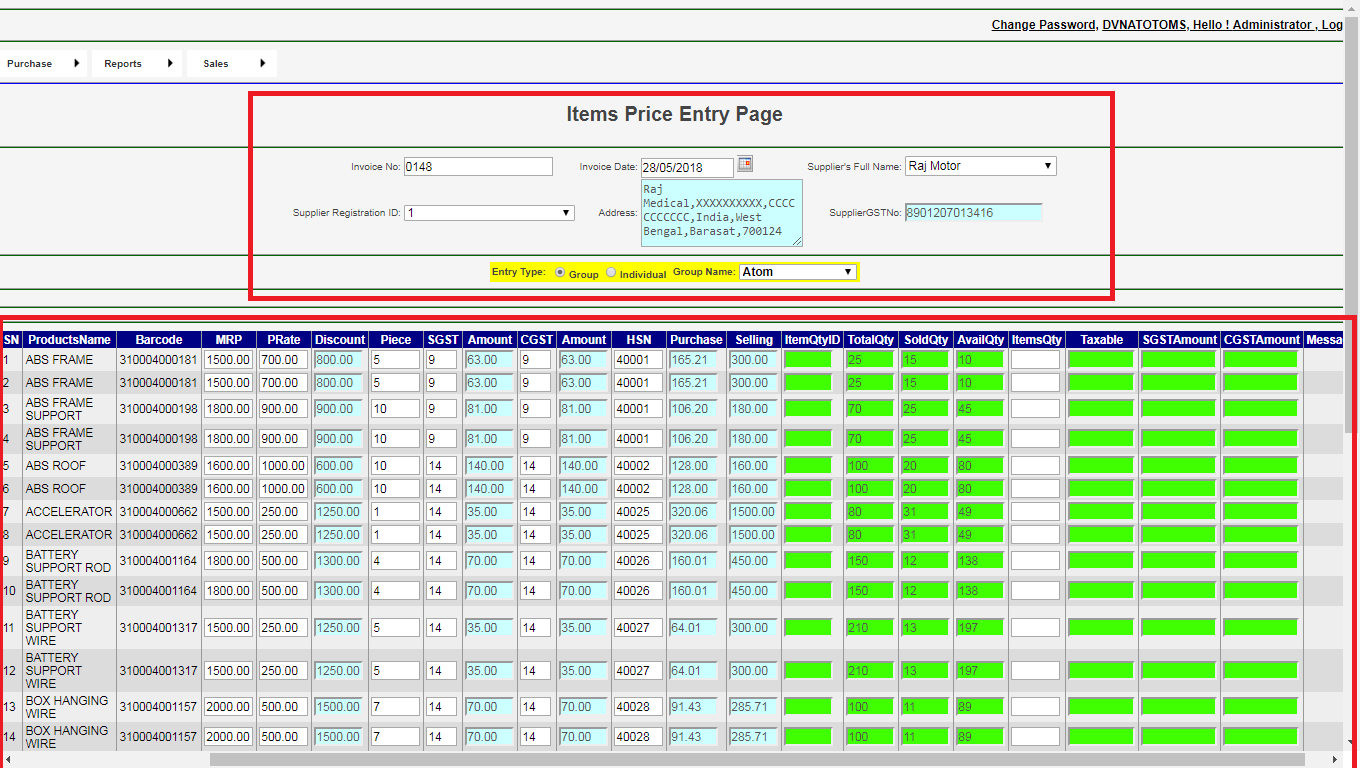
This is one kinds of inventory entry. You can enter price setting of all products together. First of all you have to select products type. After selecting products type it will show grid view on tabular format of items price entry and quantity entry. Steps are shown in below image marked section.
|
|
|
Below mention image will show three buttons one for price save second one is for price update and last one is quantity entry. Red color marked button will be used for price entry and blue colored marked button for quantity entry only. Here it needs to understand properly the function of all buttons events to avoid mistake. Now price entry inventory entry finished by both method.
|

|
Items sale part:
|
|
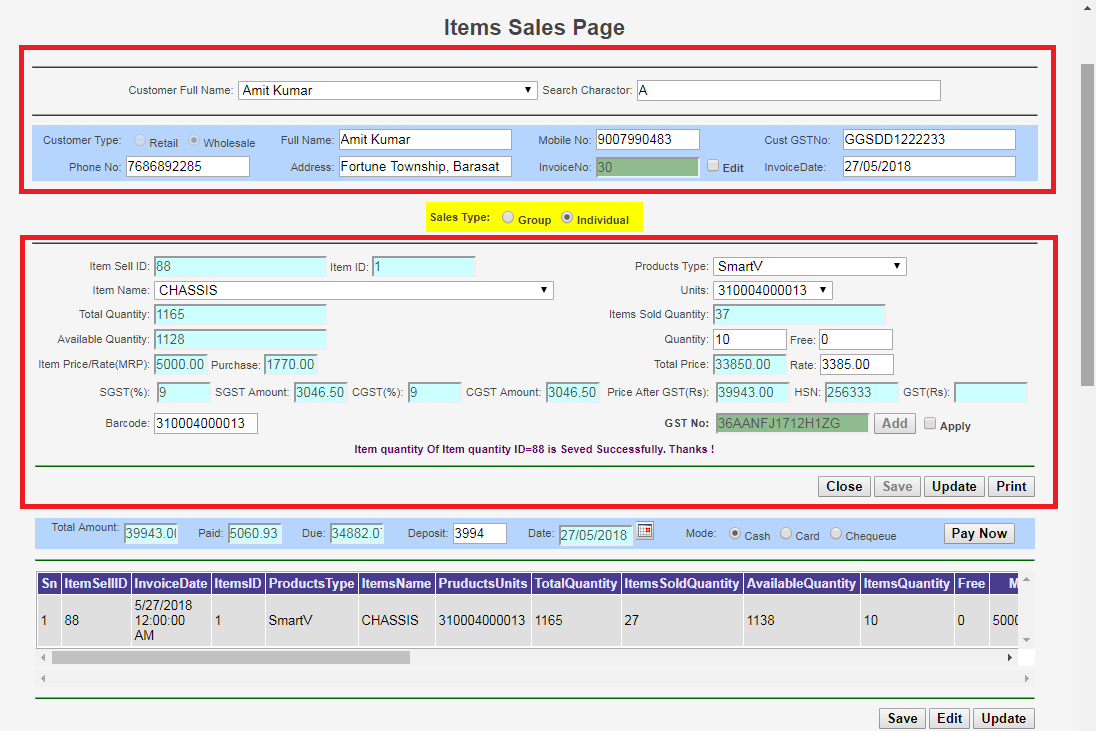
This page is use for selling products. Here you can sale individual products and group products together.
(A). Individual Product Sales:
(B). Group Products Sales:
|
(A). Individual Product Sales:
|
|
It is kinds of sales by using this software. Here you can sales individual products with the help of barcode scanner or reader. You have to enter barcode of product after searching your required customer. If customer is new then you have to fill the form in customer section which is mention in image.
|
|
(B). Group Products sales:
|
|
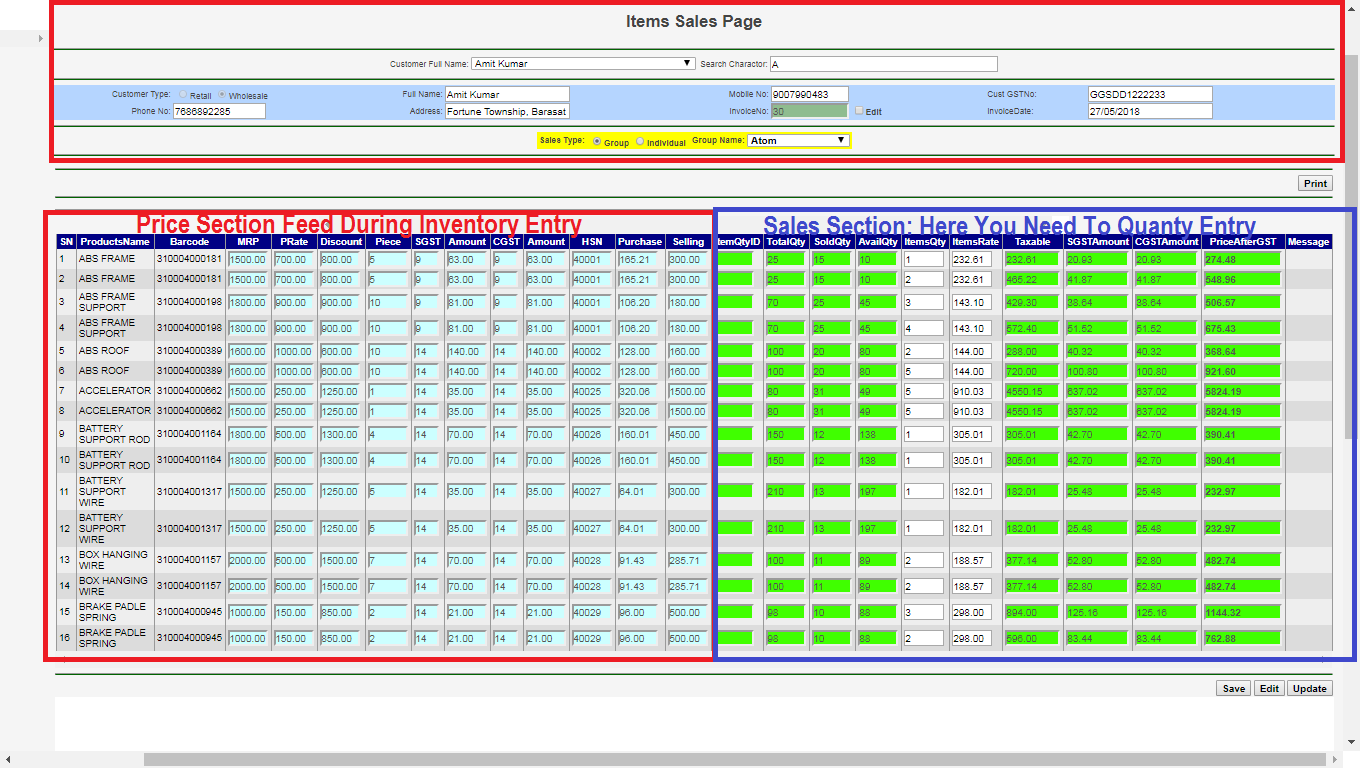
It is kinds of sales by using this software. Here you can sales group products with the help of product type selection. You have to select product type. Whenever you will select product type then it will show grid view as tabular form which is shown in below. Here you have to put quantity and rate in grid view section. One advantage is that when you will put quantity then it will give auto rate. If rate is satisfactory then we can move forward or you can change it according to business need.
|
|
|
In customer section you can search existing customer. After searching your required customer. Customer section will auto fill. If customer is new then you have to fill the form in customer section which is mention in image.
|
|
After completion of form. You have to click on save button shown in below. Here you can edit if you want to edit the form. Whenever you will click on edit then it will allow edit and after edit you have to update. Hence you can use it according to your business requirement. Now sales part is completed.
|