How to create Setup project in Visual Studio 2008 to deploy web application in IIS?
If we did any web application development and if it works perfectly then we have
to prepare setup file to deploy same web application in IIS by execute setup
files.
Steps to
create Setup file for web application.
Step1: Open
visual studio -à Create new
Project and open Default.aspx page and write code as given below.
|
<html xmlns="http://www.w3.org/1999/xhtml">
<head runat="server">
<title>Example to Create Setup Files</title>
</head>
<body>
<form id="form1" runat="server">
<div>
<table width="100%">
<tr>
<td>
<h1>This is
test project.</h1>
</td>
</tr>
</table>
</div>
</form>
</body>
</html>
|
|
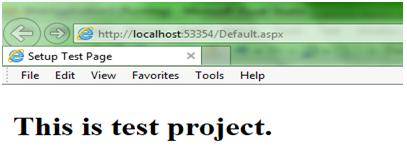
Now run
application and output will be like this.
|

|
|
Step 2: Now
Project is ready with sample page and add new project. (Go to
File ---> Add ---> New Project)
Step3:
Click on New Project another window will open. Now Select Other Project
Types ---> Setup and Deployment ---> Web Setup Project ---> once we select Web
Setup project give a name and click OK
Setp4: Now
setup project has added to application as given below.
Step5:
After add setup project open Solution Explorer ---> Right click on Setup
project ---> Add --->Project Output
Step6:
Click on Project Output it will open another window to select required output
files in that window select Primary Output and Content Files then click OK
Step7: Here
we selected two options. Primary Output and Content Files because if we add
Primary Output it will add only files which are in bin folder and if we select
Content Files option then it will include .aspx files and web.config file to
setup file.
Step 8: Now
click on rebuild solution file and it will be shown as given below and message
will be build successful.
Step 9: We
can rebuild setup file as given below once rebuild is completed then we have to
go to project folder. We will find setup file. Now setup file is ready to use.
Step 10: We
can run setup file directly from that folder or right click on setup project in
visual studio and select Install.
Step 11:
Click on Install it will display welcome wizard.
Step 12:Now click
next in next screen we will see options Site, Virtual Directory and Application
Pool fill these options and click Next button
Step 13: In next
screen it will display Confirm Installation you need to click Next
Step 14: Whenever we
click on Next button that will start installation process in next screen like
this
Step 15: Once
installation process completed then that will display installation completed
successfully window
Step 16: Now open
your IIS by type “inetmgr” in Run and check your IIS if that contain our
installed application or not
Step 17: Now your
site is ready you can browse from IIS that will display output.
Step 18: Here we can
uninstall this application easily for that Go to Setup project in visual studio
Right click on it and you will find option Uninstall
Step 19: Second way
Go to Control Panel ---> programs --->Uninstall Program ---> Add or Remove
Programs --->select your installed sample right click on it and select uninstall

|